Viewing Georeferenced Layers in QGIS
This guide explains how to add georeferenced maps to QGIS as either XYZ or WMTS tilesets.
View a Brief georeferenced layers list or How to find all georeferenced layer URLs (in our Georeferenced Maps viewer).
Once you've selected a map, copy the associated XYZ or WMTS URL depending on your choice of method and note the Maximum Zoom Level. Next, launch QGIS and follow the appropriate XYZ or WMTS guide:
I. Adding XYZ Tilesets in QGIS
II. Adding WMTS Tilesets in QGIS
III. Adding WFS Metadata in QGIS
I. Adding XYZ Tilesets in QGIS
- From the left-hand Browser Panel, right-click on XYZ Tiles and select New Connection.
(Tip: Make sure your Coordinate Reference System (CRS) is set to (WGS 84) EPSG: 3857/ Google Spherical Mercator. Click the CRS tool from the menu bar at the bottom of your screen, which also contains the scale and magnifier options. Navigate to the correct CRS in the new dialog box which appears and select OK).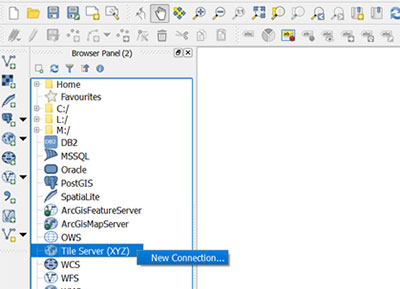
- Paste the XYZ URL into the dialog box and select OK. To find URLs view our Brief georeferenced layers list or read
How to find all georeferenced layer URLs (in our Georeferenced Maps viewer).

- In the XYZ Tile Layer dialog box edit the Max Zoom Level to match the maximum zoom level of the tileset.

- In the XYZ Tile Layer dialog box enter a suitable name for your map and select OK.

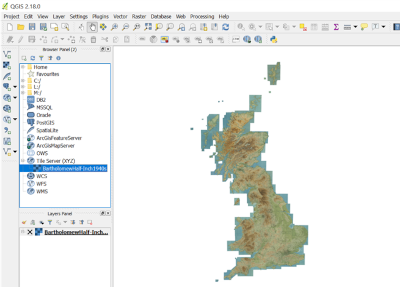
- Finally, double-click XYZ Tiles in the left-hand Browser Panel. The new XYZ Tile layer should appear underneath the XYZ Tiles option, double click it to add the georeferenced map to your project.
II. Adding WMTS Tilesets in QGIS
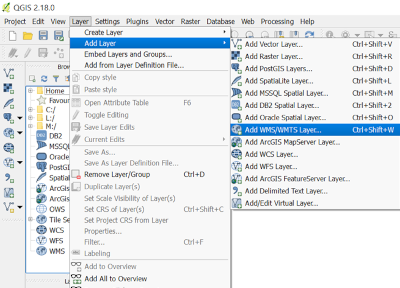
- From the Layer menu, select Layer > Add WMS/WMTS Layer.
- In the dialog box make sure the layers tab is select before clicking New.

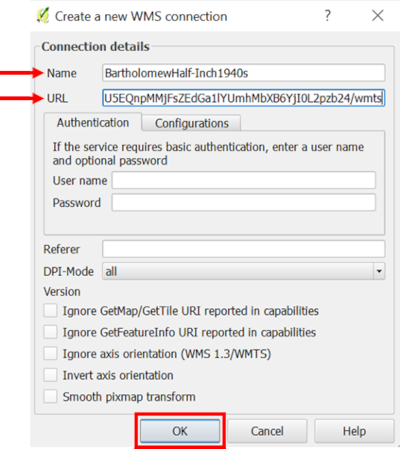
- Give your layer a suitable name and add the WMTS URL. Press OK. To find URLs view our Brief georeferenced layers list or read
How to find all georeferenced layer URLs (in our Georeferenced Maps viewer).
- Back in the Add Layer(s) from a WM(T)S Server dialog box, click Connect.

- The dialog box should switch to the Tilesets tab, and the name of your layer should appear. Select your layer and click Add.

- Select Close to exit the dialog box.
- You should now see your map as a layer inside your QGIS project.
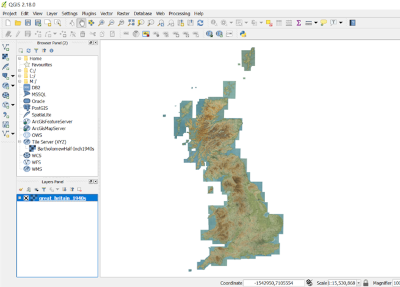
III. Adding a Web Feature Service (WFS) to QGIS
- This allows you to view geographic metadata about the specific maps in our georeferenced layers. From the Layer menu, select Layer > Add WFS Layer and then select New.
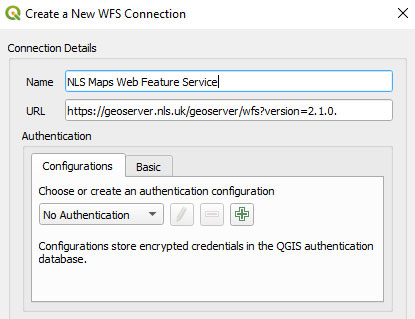
- Add a name for the new Web Feature Service, and for the URL use:
https://geoserver.nls.uk/geoserver/wfs?version=2.1.0.
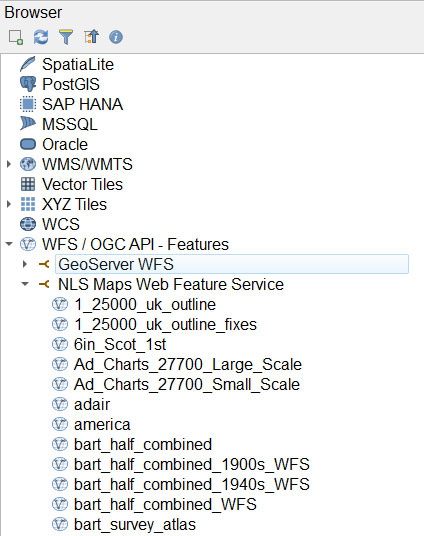
- Select Connect and your new Web Feature Service should appear in the Browser Panel along with a list of Layers or Typenames.
- The specific layer details are listed in the Overlay tab for the specific layer you are interested in as Layer WFS Metadata. The main fields with useful metadata in every layer are:
- SHEET Map Title
- DATES Main Dates
- WFS_TITLE Map Title and Dates
- IMAGEURL Link to zoomable image of map
- Viewing georeferenced layers in ArcGIS – as XYZ / WMTS tilesets
- Viewing georeferenced layers inside geojson.io
- Viewing georeferenced layers inside OpenStreetMap
- Brief georeferenced layers list - with XYZ / WMTS URLs
- How to find all georeferenced layer URLs - in our Georeferenced Maps viewer
View related Guides:
How to find URLs of georeferenced layers:
View our Viewing georeferenced maps guides.
If you have further suggestions or comments on this guide, please contact us at maps@nls.uk.
