Ten things you (maybe) didn't know about our maps website
classic picture, taken from the OS One-Inch to the
Mile, Dorking & Leith Hill map cover, ca. 1929.
Top tips for successful online historical map rambles.
- Find all the maps of a place with a Marker search
- Narrow date range when searching
- Change background layer
- Use Full Screen
- Measure distances and areas
- Add a marker (to locate and share a specific feature with others)
- Copy map coordinates
- View map sheet (from a georeferenced layer)
- Search on OS six-inch 1888-1913 names
- Rotate map
General
We now have just over 230,000 maps online (July 2020). The geographic focus is on Scotland, but there is good coverage of Ordnance Survey maps of England and Wales too, and of scattered places beyond the United Kingdom. This is around 15% of our collection; the aim is to make over 30% available online by 2025. Less than half of these maps are georeferenced, especially pre-Ordnance Survey maps. Our Recent Additions page provides details of our latest updates.
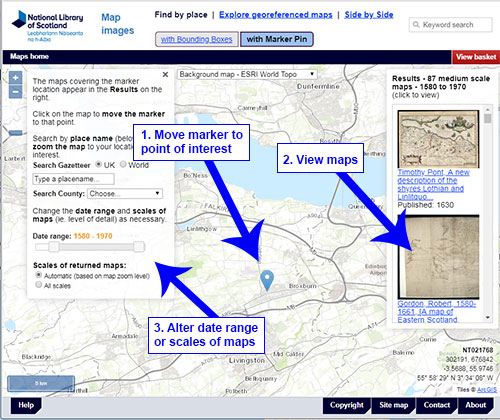
1. Find all the maps of a place with the Map Finder - with Marker search
This is the quickest way to find everything that we have online covering a particular place. 1. Just Move the marker to your place of interest. 2. The maps covering the marker location appear in the Results on the right. Click on the map image thumbnails to view the maps. 3. You can also filter the date range and scales of the returned maps.
- Go to the Map Finder - with Marker search.
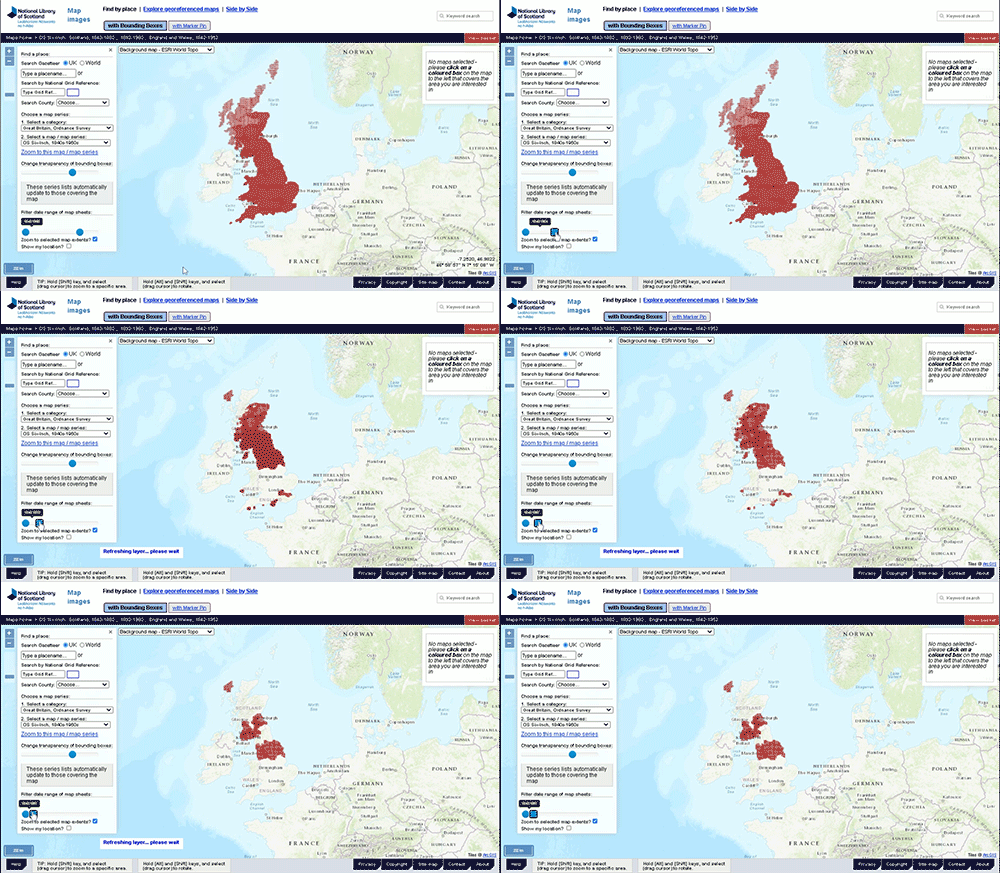
2. Narrow date range in the Map Finder - with Outlines search
For some of our largest layers, near the bottom of the left-hand side panel, you can narrow the date range of the displayed and returned maps by adjusting a date range slider.
The map will refresh to just display those maps that fall within the smaller date range you select. If you click on any of the bounding boxes, just those that fall within the smaller date range are returned.
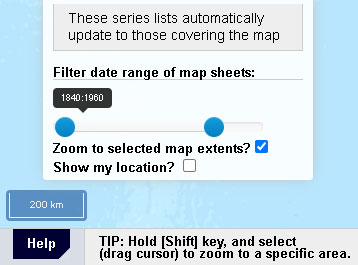
- Go to the Map Finder - with Outlines search.
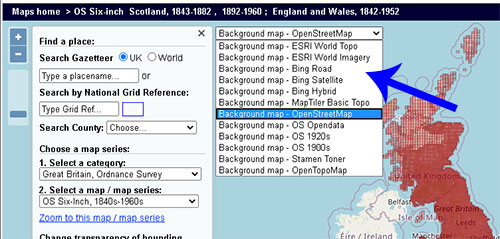
3. Change background layer (to show a different satellite or map layer) in the geographical viewers
You can change the background layer in any of our georeferenced map viewers using the drop-down list in the centre top of the screen - eg. in Map Finder, Georeferenced Maps, the Records viewer or the Boundaries viewer.
- Go to the Map Finder - with Outlines search interface to try this.
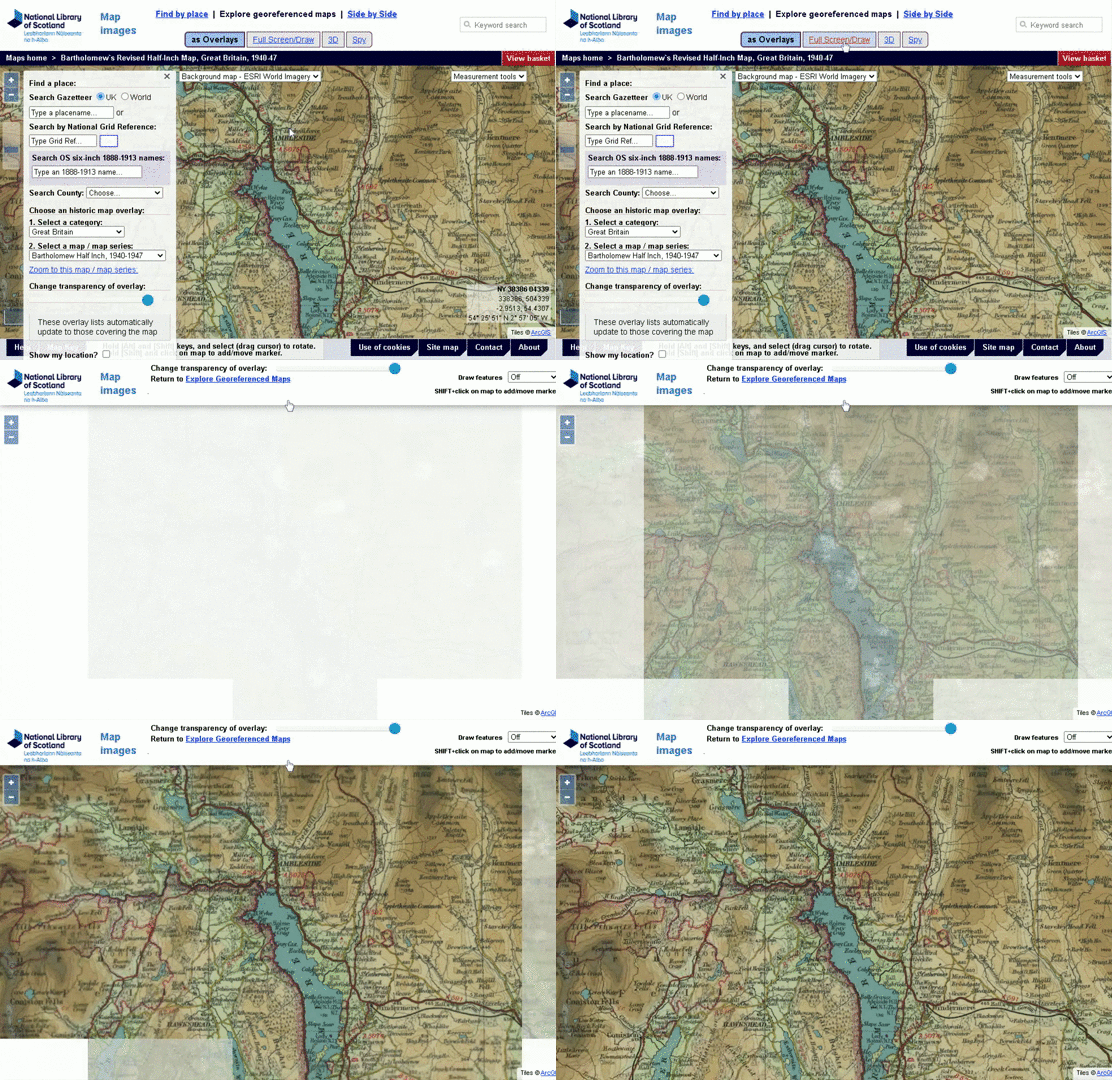
4. Use Full Screen in the Georeferenced Maps viewer
The Full Screen / Draw viewer can be selected in the header, and provides maximum screen space for the map, by removing the left-hand panel and footer.
This is useful for saving screen grabs. It is also possible to draw points, lines and shapes for annotating features.
- Go to the Georeferenced Maps viewer to try this.
5. Measure distances and areas in the Georeferenced Maps viewer
These tools, to the upper-right in the Georeferenced Maps viewer, allow you to trace a linear route to measure distance, or trace a polygon to measure area. Once selected, click points on the map to draw your route or area, and double-click with the mouse to stop the current measurement.
Select the 'Turn off measurement tools' to cancel these measurement tools and use the mouse for normal selection, pan and zoom functions.
- Go to the Georeferenced Maps viewer to try this.
6. Add a marker in the Georeferenced Maps viewer (to locate and share a specific feature with others)
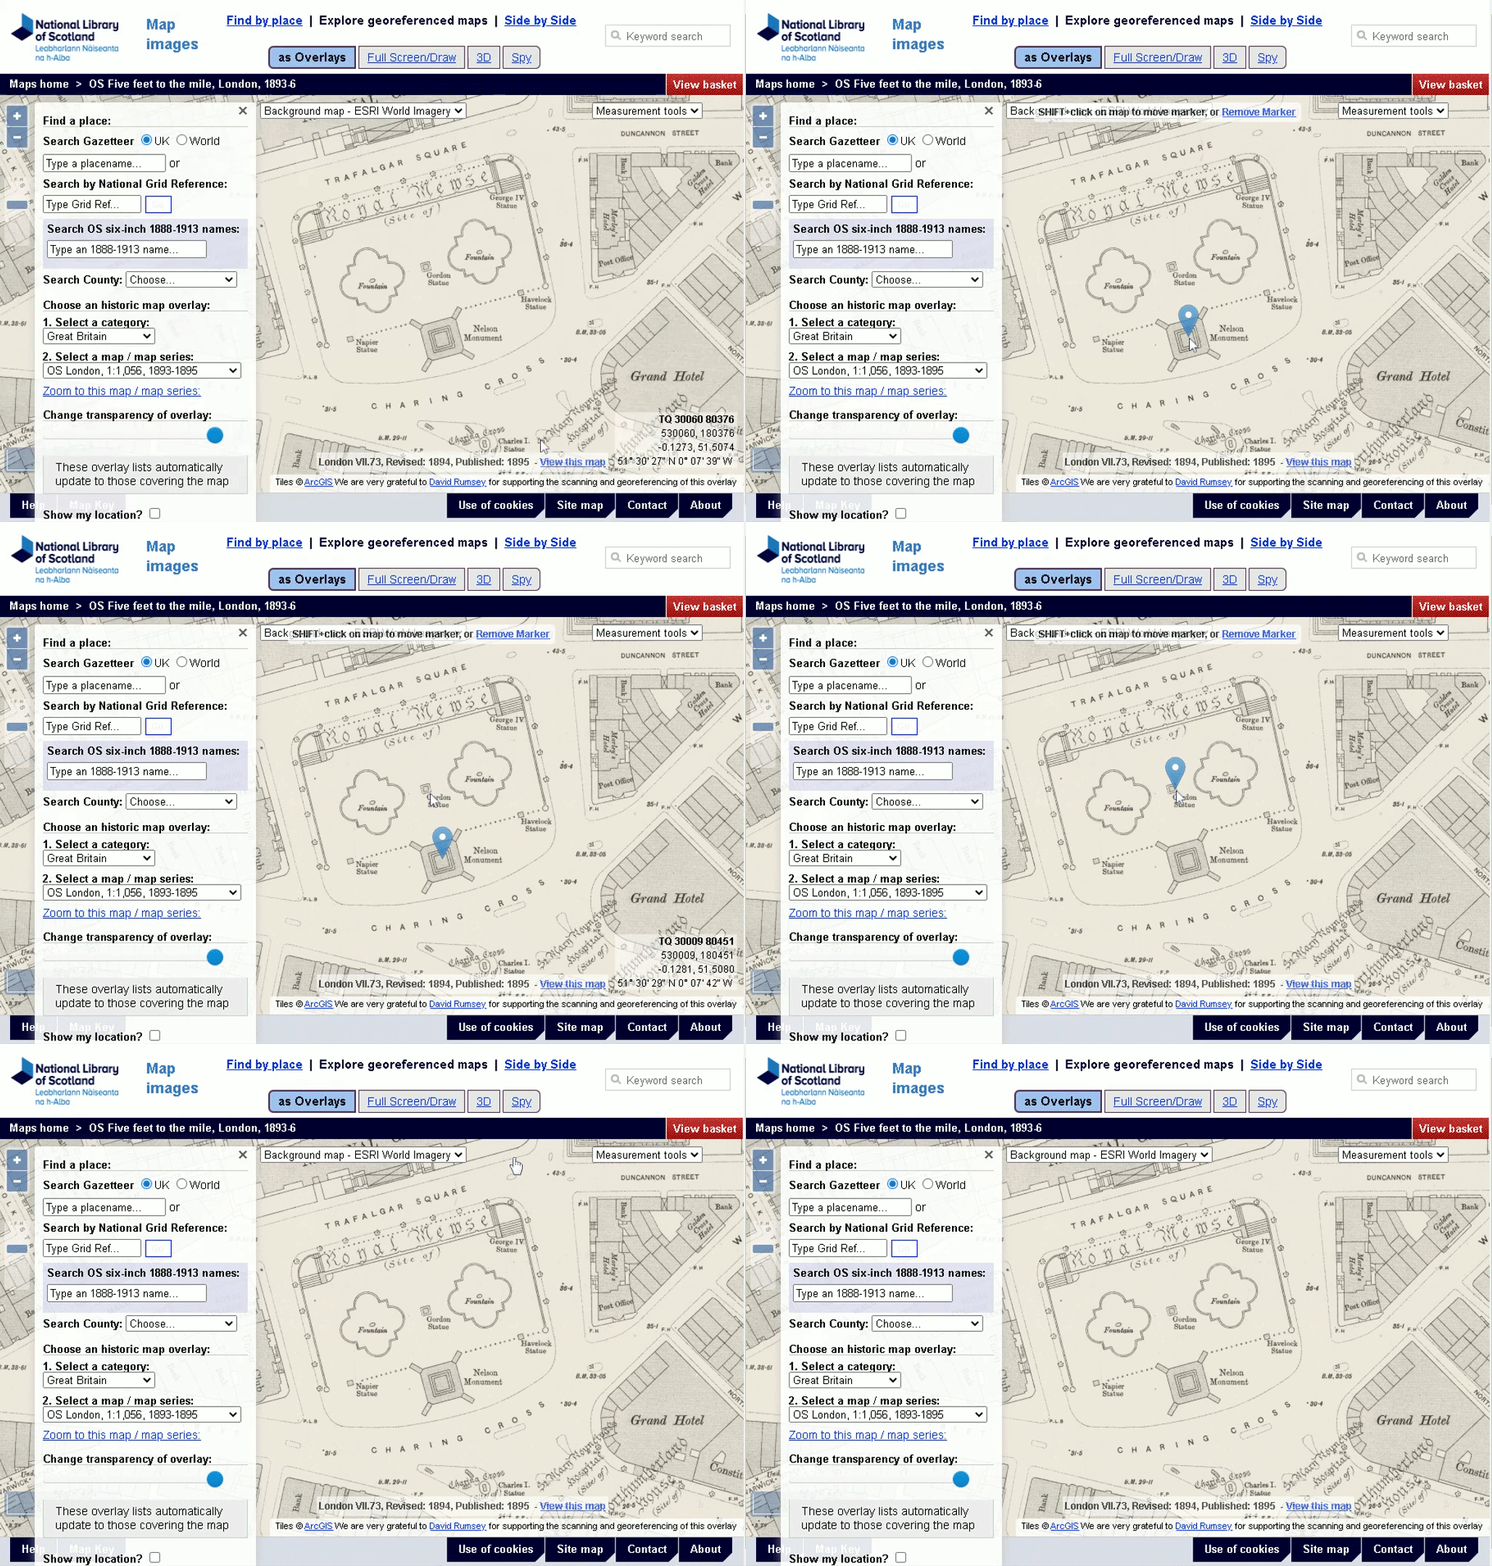
To add a marker to a specific place on the map, hold the [Shift] key down and left-click on the map. If you [Shift] + click a second time, it moves the marker to the second place you click.
Whenever there is a marker on the map, the URL has an additional marker=[lat,lon] suffix. You can save this whole URL or pass it on to others, and it will keep the specific marker location on screen (along with other map details, etc.) when you send the URL. The Marker can be added to the main Georeferenced Maps viewer and the Full Screen / Draw viewer.
You can remove the marker by clicking on the 'Remove Marker' link that appears to the top of the screen when there is a marker on screen.
- Go to the Georeferenced Maps viewer to try this.
7. Copy map coordinates in the Georeferenced Maps viewer with [Alt] + left-click
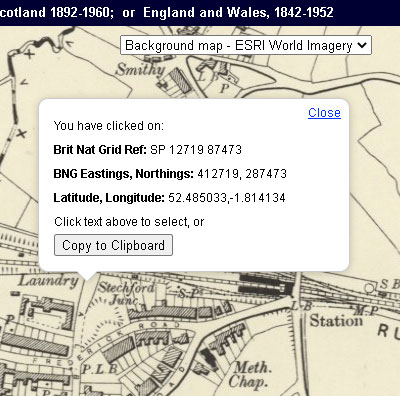
Hold the [Alt] key down and left-click with the mouse to bring up a popup box with the map coordinates for the point you have clicked on. This includes the British National Grid Reference, British National Grid Eastings and Northings, and longitude and latitude which can be selected or copied to the clipboard.
- Go to the Georeferenced Maps viewer to try this.
8. View map sheet (rather than the georeferenced map) in the Georeferenced Maps viewer
For our largest georeferenced layers, the specific map sheet that your cursor is over appears to the lower right at higher zoom levels, followed by a 'View this map' link. If you click this link, it will open the specific map sheet in the centre of the screen as a zoomable image in a new window.
This is useful if you want to view the original map sheet with its margins, rather than the cropped, georeferenced version in the Georeferenced Maps viewer.
- Go to the Georeferenced Maps viewer to try this.
9. Search on OS six-inch 1888-1913 names in the Georeferenced Maps viewer
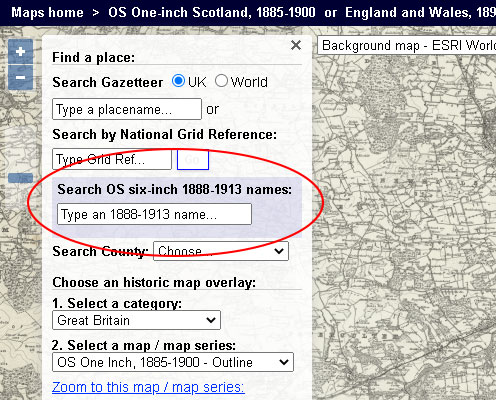
The Search on OS six-inch 1888-1913 names gazetteer allows the text strings and place names from the Ordnance Survey six-inch to the mile, 1888-1913 map layer to be searched. This has many names not found in modern gazetteers.
These names were collected from the GB1900 transcription project. This crowdsourcing project ran from September 2016 to January 2018, and collected 2.6 million names - virtually all the names on this map series covering England, Scotland and Wales. It includes many smaller settlement names, farms, hamlets, and some street names from just over a century ago.
- Go to the Georeferenced Maps viewer to try this.
10. Rotate map with [Alt] + [Shift]
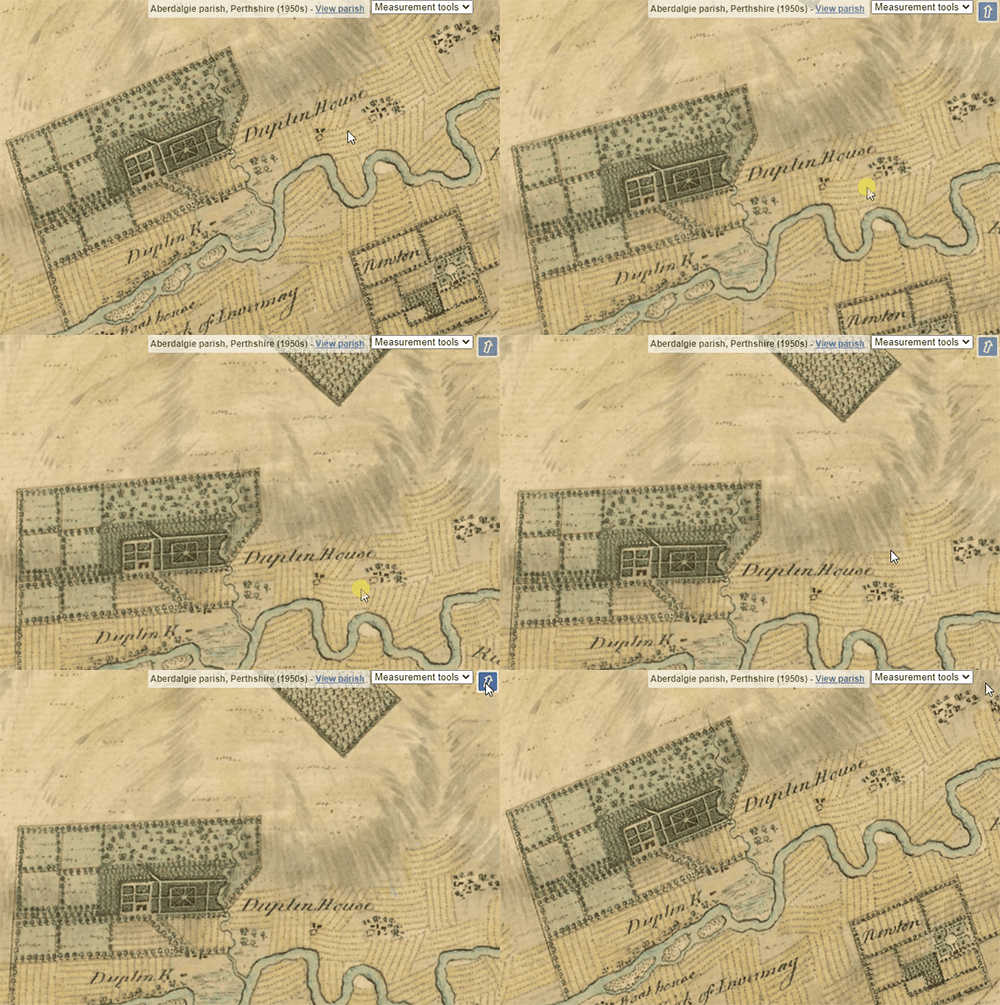
Hold the [Alt] and [Shift] keys down, and drag with your cursor, or pinch with two fingers on a touch screen to rotate the map. Click/tap on the blue arrow to the upper right, or refresh the page to return to the default rotation.
This rotates the map in all of our viewers, in Map Finder, Georeferenced Maps, the Records viewer or the Boundaries viewer, as well as the Zoom and pan viewer.
- Go to the Georeferenced Maps viewer to try this.
Many thanks for reading this far! Once we got going, we actually found we had a few more than ten things:
11. Link to a specific part of the map, in the Zoom and pan viewer
By default, the standard URL for each map (ie. maps.nls.uk/view/[map ID] ) presents the initial view of the whole map on the screen.
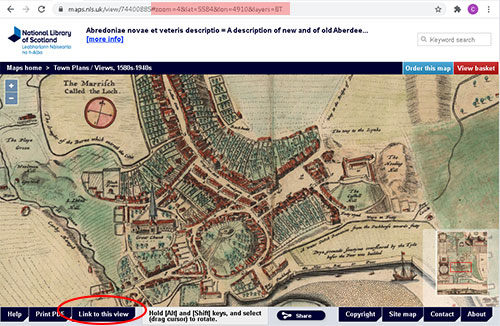
To save or send a link to a more specific part of the map, zoom and pan to the area you are interested in, then select the Link to this view tab (circled in red below). A suffix will be added to the standard URL. This includes zoom=, lat= and lon= parameters (highlighted in pink below in the address bar) which relate to the original image and pixel dimensions. If you copy this longer URL, it will link to the specific part of the map - useful for sharing this specific part of the map with others.
- Go to the Zoom and pan viewer to try this.
12. Show the real-world location of the map in the Zoom and pan viewer
When viewing a series map, click on the Show location tab in the footer, to bring up options to view its real-world location:
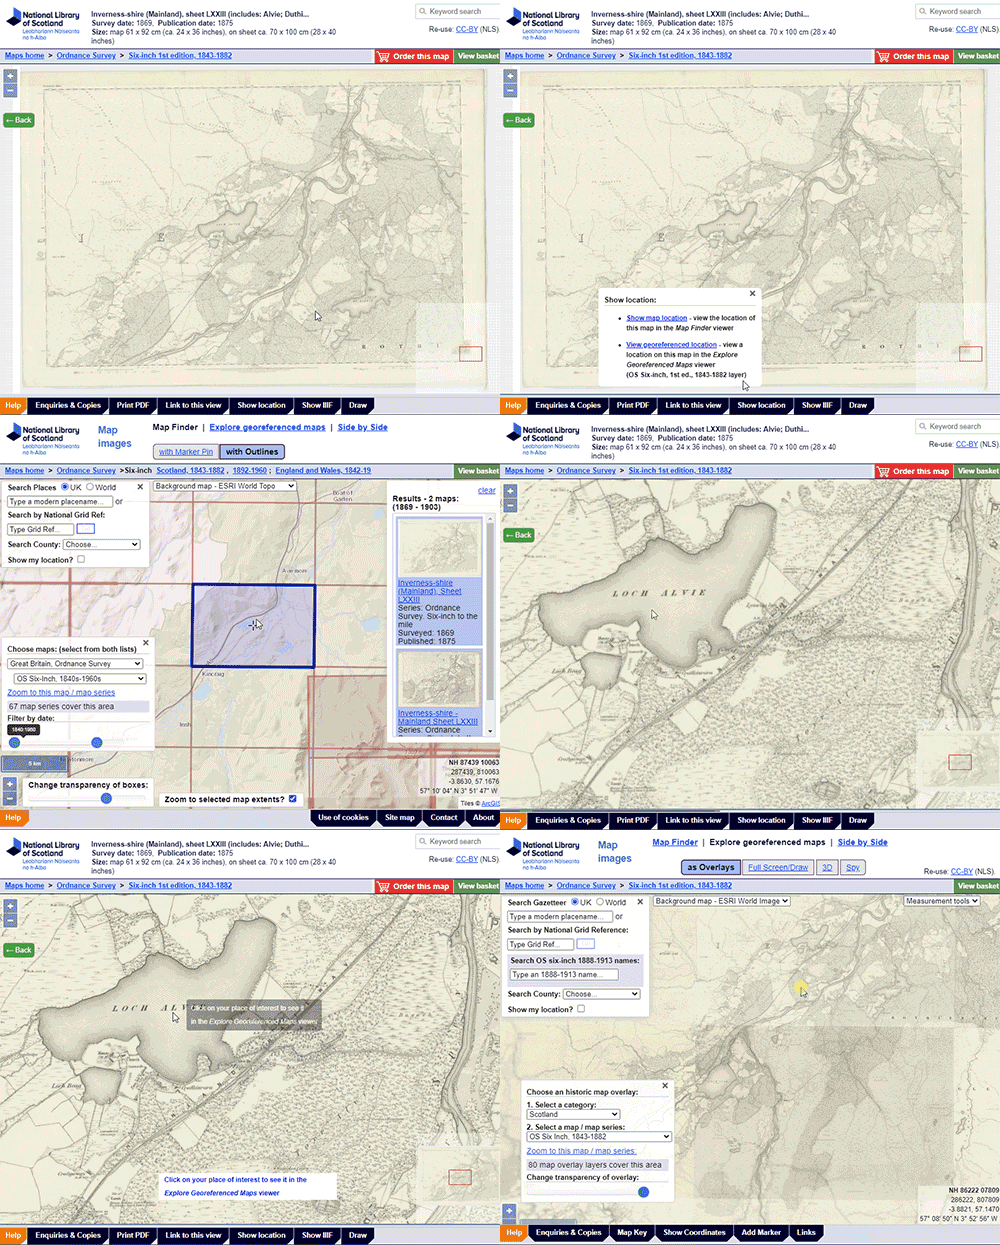
- Select Show map location if you want to see the location of this map in the Map Finder viewer.
The Map Finder viewer will then open, showing the location of the map, with its outlines/extents highlighted along with maps from the same series. This is useful for showing the outlines of the map in their real-world location, allowing you to also view other maps covering the same place, or adjacent maps. - Select View georeferenced location to click on the map and view its location in the Georeferenced Maps viewer. The Georeferenced Maps viewer will then open, showing the georeferenced layer the map is from, centred on the place you have clicked on. This is useful for showing the map you have been looking at in its real-world location, so you can compare it with other georeferenced layers.
- Go to the Zoom and pan viewer to try this.
We hope you have found some of these functions new and useful. If you have further suggestions of functions to add, please do contact us at maps@nls.uk.

